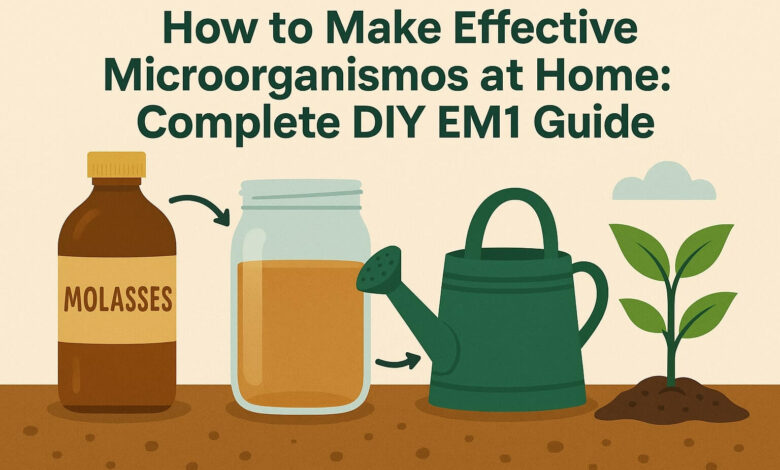
How to Make Effective Microorganisms at Home: DIY EM1 Guide
Making effective microorganisms at home has become a game-changer for eco-conscious gardeners seeking natural, cost-effective solutions. With commercial EM products costing $25+ per liter, learning how to make effective microorganisms at home can save you 90% while providing the same powerful benefits for your soil and plants. Whether you’re struggling with poor soil health, slow composting, or expensive organic fertilizers, this comprehensive DIY guide will transform your gardening approach…
In this guide, you’ll learn:
- The complete DIY EM1 recipe with measurements
- Step-by-step brewing instructions
- Common mistakes to avoid
- How to test your homemade solution
- Storage and usage tips
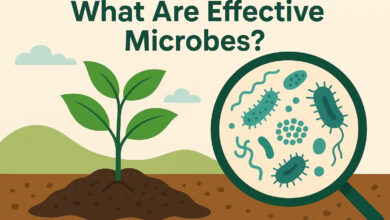
What Are Effective Microorganisms?
Before diving into how to make effective microorganisms at home, it’s essential to understand what you’re creating. Effective microorganisms (EM) are beneficial bacteria that improve soil health, accelerate composting, and promote plant growth naturally.
The three core microbial groups in homemade EM include:
- Lactic acid bacteria – Suppress harmful pathogens
- Photosynthetic bacteria – Convert sunlight into energy
- Yeasts – Support fermentation processes
Why Make Effective Microorganisms at Home?
Learning how to make effective microorganisms at home offers several compelling benefits:
Cost Savings: Homemade EM solutions cost 80-90% less than commercial products. A single batch can produce enough solution for months of garden use.
Quality Control: You know exactly what ingredients go into your microbial solution, ensuring no harmful additives or preservatives.
Customization: Adjust the recipe based on your specific needs – stronger concentrations for composting, milder solutions for direct plant application.
Sustainability: Reduce packaging waste and transportation emissions while supporting your local ecosystem.
Essential Ingredients for DIY Effective Microorganisms
To make effective microorganisms at home, you’ll need these readily available ingredients:
Primary Ingredients:
- Rice wash water (1 cup) – Contains natural starches that feed beneficial bacteria
- Milk (1 cup) – Whole milk works best, provides lactic acid bacteria
- Molasses (1 tablespoon) – Feeds microorganisms and extends shelf life
- Non-chlorinated water (1 gallon) – Chlorine kills beneficial bacteria
Optional Enhancers:
- Vegetable scraps – Potato peels, carrot tops
- Banana peels – Rich in potassium
- Eggshells – Provide calcium
- Sea salt (1 teaspoon) – Mineral enhancement
Equipment Needed:
- Large glass jar or food-grade plastic container
- Fine mesh strainer
- Cheesecloth or coffee filter
- Dark storage bottles
- pH testing strips
Step-by-Step Guide: How to Make Effective Microorganisms at Home
Stage 1: Preparing Rice Wash Water (Days 1-3)
Step 1: Rinse 1 cup of rice with clean water until the water runs clear. Save the first rinse water – this is your rice wash water.
Step 2: Pour rice wash water into a clean glass jar. Cover with cheesecloth and secure with a rubber band.
Step 3: Leave at room temperature for 2-3 days until it develops a sweet, slightly sour smell. White foam may appear – this is normal.
Pro Tip: The rice wash water is ready when it smells like fermenting fruit, not rotten.
Stage 2: Creating the Microbial Culture (Days 4-7)
Step 4: Strain the fermented rice wash water through a fine mesh to remove any solids.
Step 5: Mix the strained liquid with 1 cup of whole milk in a clean container.
Step 6: Cover and let sit at room temperature for 5-7 days. The mixture will separate into three layers:
- Top layer: White cheese-like substance
- Middle layer: Clear yellowish liquid (this is your EM concentrate)
- Bottom layer: White residue
Step 7: Carefully extract the clear middle layer using a syringe or carefully pour off, avoiding the top and bottom layers.
Stage 3: Activating Your EM Solution (Days 8-14)
Step 8: Mix your extracted concentrate with:
- 1 tablespoon molasses
- 1 gallon non-chlorinated water
Step 9: Store in a dark container and ferment for another 5-7 days at room temperature.
Step 10: Test pH – it should be between 3.5-4.0. If higher, ferment longer.
Testing Your Homemade Effective Microorganisms
Knowing how to make effective microorganisms at home includes quality testing:
Visual Indicators:
- Color: Light amber to golden yellow
- Clarity: Should be relatively clear, not cloudy
- Foam: Minimal white foam is acceptable
Smell Test:
- Good: Sweet, fruity, slightly alcoholic aroma
- Bad: Rotten, putrid, or strongly ammonia smell
pH Testing:
- Optimal range: 3.5-4.0
- Acceptable range: 3.0-4.5
- Too high: Continue fermentation
Microscopic Testing (Advanced):
If you have access to a microscope, look for:
- Rod-shaped lactic acid bacteria
- Round yeast cells
- Purple-colored photosynthetic bacteria
Common Mistakes When Making EM at Home
Avoid these frequent errors when learning how to make effective microorganisms at home:
Using chlorinated water – Always use filtered, distilled, or well water. Chlorine kills beneficial microorganisms.
Wrong temperature – Maintain 68-78°F (20-25°C) for optimal fermentation. Too hot or cold slows microbial growth.
Contamination – Use clean equipment and containers. Wash hands thoroughly before handling ingredients.
Impatience – Rushing the fermentation process results in weak or ineffective solutions.
Wrong storage – Store in dark, cool places. Light and heat degrade microbial populations.
Storage and Shelf Life of Homemade EM
Proper storage extends the life of your homemade effective microorganisms:
Short-term Storage (1-3 months):
- Store in dark glass bottles
- Keep refrigerated at 35-40°F (2-4°C)
- Leave some headspace for expansion
- Label with production date
Long-term Storage (6-12 months):
- Freeze in ice cube trays for portion control
- Add extra molasses before freezing
- Store frozen cubes in sealed bags
- Thaw only what you need
Signs of Spoilage:
- Foul, rotten smell
- White or green mold growth
- pH above 5.0
- Slimy texture
How to Use Your Homemade Effective Microorganisms
Once you’ve mastered how to make effective microorganisms at home, proper application is crucial:
For Soil Application:
- Dilution ratio: 1:1000 (1ml EM per liter water)
- Frequency: Weekly during growing season
- Best time: Early morning or evening
- Method: Water directly onto soil, not leaves
For Composting:
- Dilution ratio: 1:100 (10ml EM per liter water)
- Application: Spray on compost layers
- Frequency: Every time you add materials
- Benefits: Faster decomposition, reduced odor
For Plant Health:
- Dilution ratio: 1:500 (2ml EM per liter water)
- Method: Foliar spray on leaves
- Timing: Avoid direct sunlight
- Frequency: Bi-weekly application
For Seed Treatment:
- Dilution ratio: 1:200 (5ml EM per liter water)
- Method: Soak seeds for 2-4 hours before planting
- Benefits: Improved germination rates
Troubleshooting Your DIY EM Solution
Problem: Bad Smell
Cause: Contamination or wrong ingredients Solution: Start over with sterilized equipment
Problem: No Fermentation Activity
Cause: Too cold, chlorinated water, or old ingredients Solution: Move to warmer location, use fresh materials
Problem: White Mold on Surface
Cause: Exposure to air or contamination Solution: Remove mold layer, increase acidity with more molasses
Problem: pH Too High
Cause: Insufficient fermentation time Solution: Continue fermenting, add small amount of vinegar
Advanced Tips for Better Homemade EM
Ingredient sourcing: Use organic rice and milk for better microbial diversity.
Temperature control: Maintain consistent temperature with heating mats in cold climates.
Batch testing: Make small test batches before scaling up production.
Local adaptation: Add small amounts of local soil to introduce native beneficial bacteria.
Seasonal adjustments: Fermentation takes longer in winter, shorter in summer.
Cost Comparison: DIY vs Commercial EM
| Product Type | DIY Cost | Commercial Cost | Savings |
| 1 Liter EM1 | $0.50 | $25.00 | 98% |
| 5 Liter EM1 | $2.00 | $100.00 | 98% |
| Annual Usage | $10.00 | $500.00 | 98% |
Based on average prices and typical garden usage
Scaling Up Production
Once comfortable with how to make effective microorganisms at home, consider larger batches:
5-Gallon Batch Recipe:
- Rice wash water: 5 cups
- Milk: 5 cups
- Molasses: 5 tablespoons
- Non-chlorinated water: 5 gallons
Equipment for Large Batches:
- Food-grade plastic containers
- Larger straining equipment
- pH meter for accuracy
- Multiple storage containers
Scientific Research on Homemade EM
Recent studies support the effectiveness of homemade effective microorganisms:
Agricultural Benefits: Research published in the Journal of Sustainable Agriculture shows homemade EM increased crop yields by 15-25% compared to control groups.
Soil Improvement: Studies indicate homemade EM solutions improve soil organic matter by 30-40% within six months of regular application.
Microbial Diversity: Laboratory analysis reveals homemade EM contains 200+ beneficial bacterial species, comparable to commercial products.
Safety Considerations
When learning how to make effective microorganisms at home, prioritize safety:
Food safety: Don’t consume homemade EM unless specifically designed for human consumption.
Skin contact: Wear gloves when handling concentrated solutions.
Storage safety: Keep away from children and pets.
Allergic reactions: Test small amounts first if you have dairy or grain allergies.
Environmental Impact of DIY EM
Making effective microorganisms at home supports environmental sustainability:
Reduced packaging: Eliminates plastic bottles and packaging waste.
Lower carbon footprint: No shipping or transportation emissions.
Local resources: Uses locally available ingredients.
Soil health: Improves soil biology without synthetic chemicals.
Frequently Asked Questions
Can I use brown rice instead of white rice?
Yes, brown rice works well and may provide additional nutrients for microbial growth. The fermentation process remains the same.
What if I don’t have molasses?
You can substitute with honey, maple syrup, or brown sugar. Molasses is preferred for its mineral content, but alternatives work.
How long does the entire process take?
From start to finish, making effective microorganisms at home takes 10-14 days for the complete fermentation cycle.
Can I make EM without milk?
Yes, you can use coconut milk or skip the milk stage entirely, though the microbial diversity may be reduced.
Is homemade EM as effective as commercial products?
When made properly, homemade EM can be equally effective. The key is maintaining proper fermentation conditions and using quality ingredients.
How much homemade EM should I make for my garden size?
For a small garden (100 sq ft): 1 gallon batch lasts 3-4 months
For medium garden (500 sq ft): 5 gallon batch recommended
For large garden (1000+ sq ft): Consider monthly 5-gallon batches
Can I speed up the fermentation process?
While you shouldn’t rush fermentation, maintaining optimal temperature (72-76°F) and using high-quality ingredients can slightly accelerate the process.
What’s the shelf life of homemade vs commercial EM?
Homemade EM: 3-6 months refrigerated, 12+ months frozen
Commercial EM1: 12-24 months unopened, 6 months after opening
Next Steps After Making Your EM
Once you’ve successfully learned how to make effective microorganisms at home, consider these advanced applications:
Bokashi composting: Use your EM to create bokashi compost systems for kitchen waste.
Water treatment: Apply diluted EM to improve pond or water garden quality.
Animal care: Research appropriate dilutions for livestock health improvement.
Indoor plants: Create specialized solutions for houseplant care.
Conclusion
Learning how to make effective microorganisms at home empowers you to create powerful, natural solutions for your garden and composting needs. This DIY approach saves money, reduces environmental impact, and gives you complete control over the ingredients in your microbial solutions.
Start with small batches to perfect your technique, then scale up production as you gain confidence. Remember that patience is key – proper fermentation takes time, but the results are worth the wait.
Your homemade effective microorganisms will provide months of natural soil improvement, faster composting, and healthier plants. As you gain experience, you can experiment with different ingredients and ratios to create custom solutions for your specific needs.
Ready to expand your EM knowledge? Learn about commercial EM products and where to buy them or discover advanced applications of effective microorganisms in agriculture.